

I am really stoked with how this project turned out! I saw something similar in a shop that I loved but it was almost $300 and I thought, pffft I could make that! And I did. Admittedly it was a little more complicated than I anticipated and it’s certainly not perfect but for the first time I’d even used a drill I am pretty chuffed with myself! Here are the completed photos, below is a little step by step if you’re interested.


The original one I saw in a shop wasn’t quite the same but similar and was around $270 and held 12 tubes. I spent less than $40 to make this and mine holds 22 tubes :) And I used larger test tubes than the “standard” size because these will mostly fit an entire 35g spice bottle, like the ones you can buy from most supermarkets. Also I love that they have a flat bottom rather than a domed one, it means I can pull one out while cooking and stand it on the bench with no worries. Perfect!
What I used:
Test tubes + corks
Rubber bands
Piece of wood
Drill + spade drill bit
Hammer
Lighter
Sandpaper
Wood stain + brush
Pencil + ruler
Bonding tape for mounting
And of course the spices!

I mentioned that I had never used a drill before. Well, wasn’t that a quick learning curve!? I owned a drill, one that I bought as a just-in-case purchase as there were a few times when I wished I had one, but hadn’t ever gotten the chance to use it. What wasn’t included in that purchase was a clue on how to properly use the thing and what kind of drill bits you need to do what job. I just assumed I could use a normal drill bit and make a hole by hollowing out the wood in a circular motion….. Yes. I’m an idiot. My first attempt looked something like this:

After a lot of laughter and self-deprecation I sought the advice of friends who informed me that there is a magical contraption that you can attach to your drill that actually MAKES HOLES FOR YOU!!! Who would have thought! My new best friend, the spade bit: (there is also something called a holesaw drill bit, but the spade was by far the most inexpensive option at just $11, compared to $40+ for the other stuff)

The wood before, which I bought precut from Bunnings for $1.15:

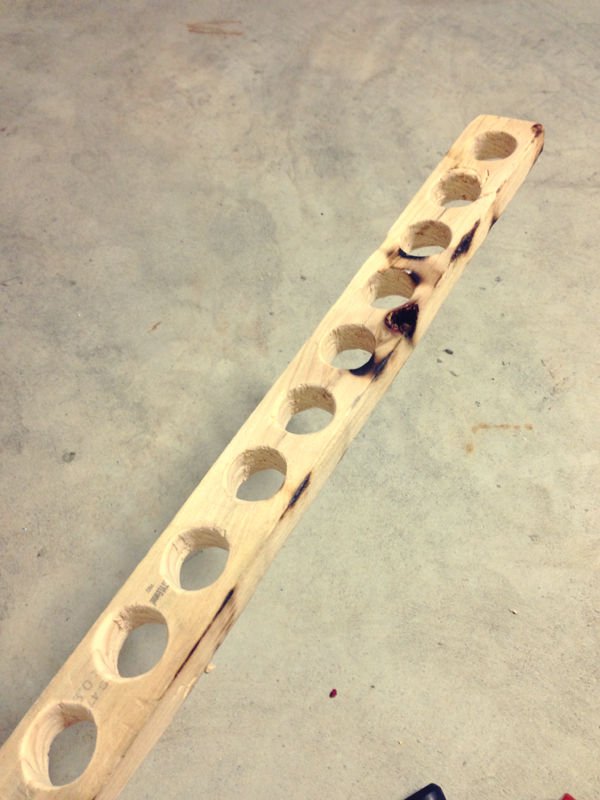
I measured out the space needed to include a gap between each hole and used a test tube to trace the holes along the slat. I then drilled a pilot hole in the middle of each circle with a 0.6mm drill bit (the one that had failed and embarrassed me earlier in the day). I actually wanted to do this project with some reclaimed wood but I just couldn’t find a piece from a couple of different junk yards that was the right dimensions or type of wood. So instead I bashed this one up a bit with a hammer and burned a few spots and it already had some great knots and disfigurement. Once the holes were drilled I did A LOT of sanding to smooth the holes but also just make them a little less snug for the tubes to fall into them easily. I then stained it, chucked some rubber bands on the tubes to act as a stopper, mounted it to the wall and voila!

I still have test tubes left over so if I can build up the strength to do it again I might look at making a terrarium version!


Super cute!! Wish I had seen this before I made over my spice cabinet recently. ~M.
I love this idea! Where did you buy your test tubes? Are they glass or plastic? Also what was the cost of the test tubes? Thanks, again I love your idea!
Hi there! Thanks :) I bought them on Etsy! They are plastic and have the flat bottom rather than domed which is so much safer for when you’re cooking, or at least when I’m cooking anyway! I can’t remember how much I paid now but I bought them in a bulk of 50 or so. Just look on Etsy, there were heaps at the time of me doing this project!
Do you want to sell your left over tubes?
No, sorry! I have other plans for those :)
Excellent crafts(wo-)manship! Imagine learners having to pass a class in wood-shop to graduate over, let’s say, calculus.
I would have absolutely loved that when I was at school!
Do you know exactly what size those test tubes were?
I too was wondering the size of the tubes?
Love your work! Thanks for all your tips & tricks 👍🏻😊